How Do I Add A User As An Escalation Contact?
This article will summarize how to create a user in Control Centre and assign them the "Escalation Contact" permissions
In order to perform this action, please ensure that you have either the Escalation Administrator or Client Administrator permissions for your client.
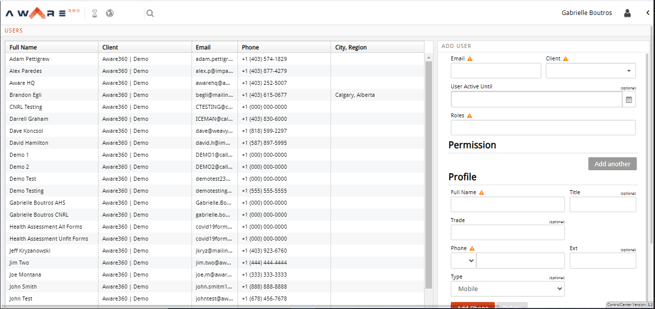
- Log into Control Centre and navigate to the "Users" tab via the menu on the left side
- Ensure that you have not selected any users. If a user is selected (shown with a blue highlight), click on the user again to de-select it.
- If there are no users selected, the "Add User" box will be visible on the right side of the screen. The orange triangles indicate necessary information.

- Fill in the user's name, phone number, email address, and the client they are a part of
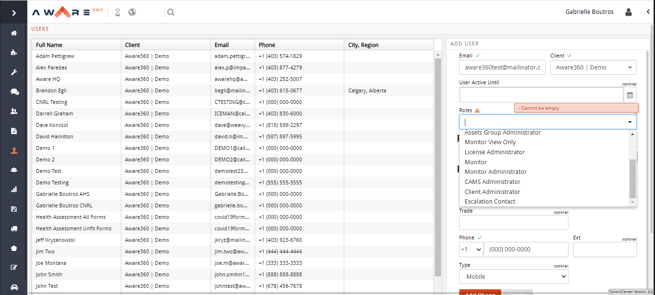
- Click inside the "Roles" box to view the dropdown menu of user roles

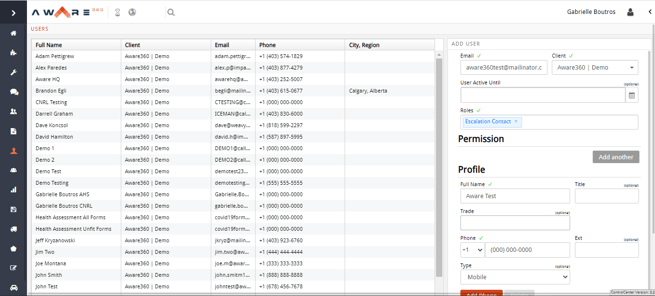
- Select "Escalation Contact". It will appear as a blue tag when applied correctly

- Scroll down to the bottom of the "Add User" section and click "Save". The new user will appear in the user list.
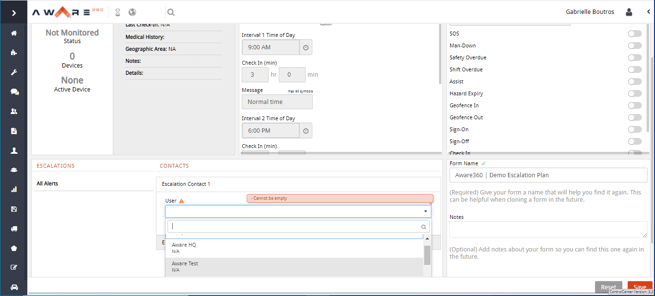
- The new user will appear as an Escalation Contact in the drop-down menu when applying a plan to a user. For more information on applying plans, please refer to this article.

This procedure can also be used to give Escalation Contact privileges to an existing user. Simply navigate to the user tab, select the existing user, and apply the roles as above. Don't forget to hit "Save"!